 RGXbot
Before you start
Known terrain, current position reading and saved profile. Pause the route while editing.
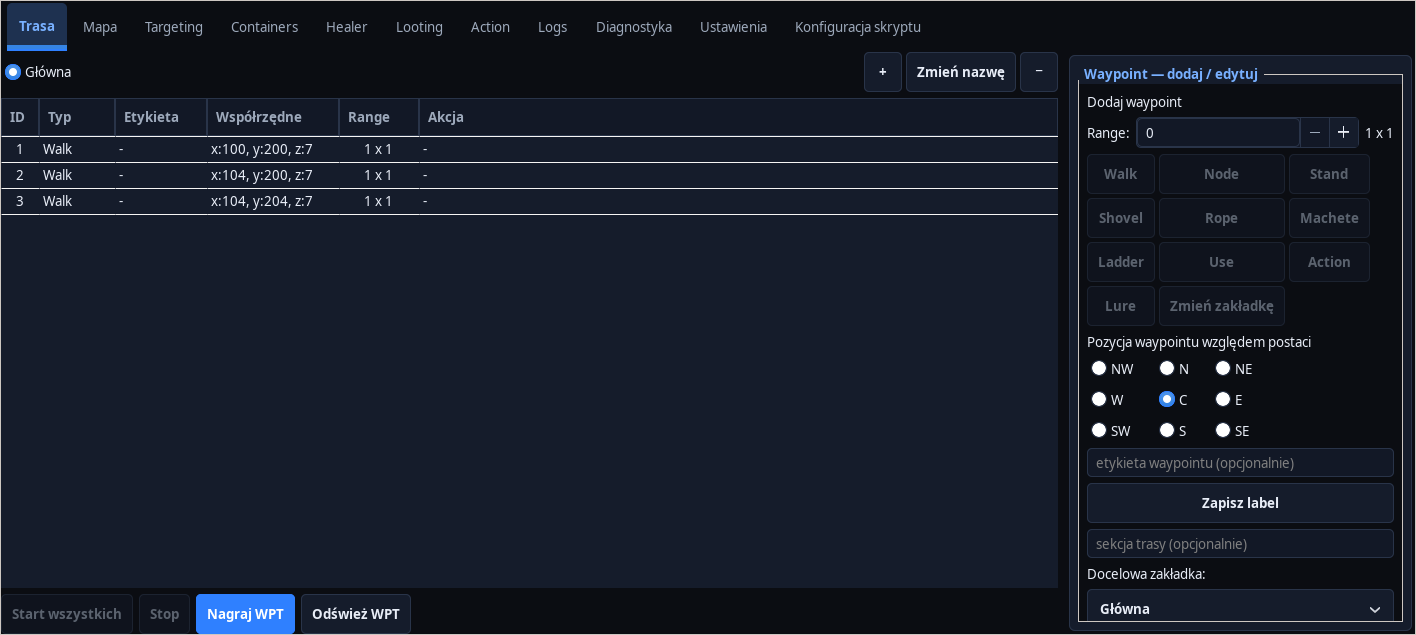 Open full screenshot ↗
Screenshot of the actual development-version interface. Settings and data are examples.
Start with a short section
Open Route and Map. Center the map on the character, set the correct Z floor and add some points by + WPT here or RMB on the map. To start, choose a simple corridor without changing floors.
Select the type of point
Walk leads to a point with a set range. The stand requires a precise location. Node is used to guide the route without forcing a stop at every field. Add Use and Ladder only when the transition object is checked.
Check order and starting point
Select a waypoint to view it on the map. Double-clicking on a map point sets the beginning of the route. Dragging the WPT changes its position when the route is stopped; the middle button moves the map and the wheel changes the scale.
Run a trial
Save the configuration and run Cavebota. Observe the current waypoint, character and movement trace. The line connecting points on the map is a preview; the actual handle depends on the currently known fields.
Handle obstacles
In the route settings, set a limit for bypass attempts. Detection of a loop causes another transition to be attempted, and when the limit is reached, navigation stops. Mark permanent unwanted fields with a blacklist or a No Pass zone.
Connect the route with combat
Enable the prepared rules Targetingu and Lootingu. Combat and corpse handling share movement with the route. Check return to waypoints after combat and save the corrected XML.
After completing the guide
The character completes a short section in the correct order and returns to the route after handling the fight.
Troubleshooting
The character does not reach the WPT
Check the floor, point type, range and blocks. Do not increase the retry limit before checking the obstacle.
The point cannot be moved
Stop the active route before editing waypoints.